Tuesday, 20 December 2011

Foodie Christmas Gifts


Christmas Cake for presents
Having become addicted to 'Ace of Cakes', I decided it was time to learn, if not how to spray paint a cake and make it look like a flamingo or the Taj Mahal, at least cover a cake with icing and some simple decorations. For that reason, I decided to join a cake decorating course at my local college, and have spent the last 8 weeks learning so much. To test how much I have learnt I even borrowed a book from the library in my half term to read and see how much I understood - and I can honestly say that at the beginning of the course I would have felt like Alice in Wonderland upon opening the book, but after just 4 weeks of my course I understood the majority of the techniques and had at least an inkling of how to carry them out. The course finished just in time for Christmas, and I decided in order to practice and reinforce some of the skills I had learnt I would make and decorate Christmas cakes for my Foodie colleagues and give them as gifts.

Making Nigella's Christmas cakes
I decided to make the majority of the cakes from a Nigella recipe, as I thought it would be more gooey than traditional Christmas Cake and that the combination of fruit, chocolate and Tia Maria would be enjoyable... and it was! Mr BB seemed to love it as several disappeared rather quickly from the cooling rack. If you want to try it follow the link below - it is a good last minute recipe as it does not need time to mature - and nor does it need to be covered in marzipan and icing, although I covered them to make them sweeter (and neater) presents.

Nigella's Chocolate Fruit Cake
Since I wanted to make my main Christmas Cake with Kirstie Allsopp's recipe, I also decided to take this oppurtunity to test it by making several minature cakes with that recipe as well, and they turned out very nicely. And for those who really can't stomach fruit cake, I purchased madeira cake (I just didn't have the time to make it unfortunately), covered it with vanilla frosting, and decorated it.

From left to right - Kirstie's Christmas cake, shop bought Madeira, and
Nigella's Chocolate Christmas cake
During my course I made some poinsetta's and Christmas roses, which adorned the tops of some of the cakes, and then used my minature Christmas tree cutters on alternate green or white icing for the rest of the fruit cakes. On the maderia cakes I made snowflakes in a variety of sizes with snowflake patchwork cutters. A dusting of edible glitter on the top of all of the cakes finished them off, and they were then wrapped in white issue paper and tied with red ribbon, ready to gift. I was really happy with how they turned out, and better yet I was able to practise my newly learned skills. I think from the texts I recieved that the recipients were happy as well x


Sunday, 11 December 2011

Decorating for Christmas

A Pastel Christmas
Today Mr BB and I went to the local nursery to buy our Christmas tree. I think it is my favourite Christmas tradition, and certainly begins the whole of the Christmas season. Having decorated the house now, I just want to cosy indoors, bake Christmas goodies and enjoy the warmth. Although it is always lovely to then contrast that with visits out into the chill to visit friends and family.

Our tree wasn't very large this year, as we only had a small space for it, but it was a lovely Fraser Fir. I relish having a real tree at Christmas - it is not a tradition from my youth, as the heat made it impractical. When I came to England I was keen to adopt the British/Germanic tradition of having a real tree, which had been started by Queen Victoria's husband in 1841 when he introduced the traditions of his German childhood to his children.

To me decorating a tree is as much about the accompaniments as what goes on the tree. To Mr BB, it wasn't Christmas without Brazil Nuts. While he did the preparation, I cooked a batch of mince pies with some homemade mincemeat I had made last year - a Delia recipe - and ready made pastry. The finishing touch was to use a minature Christmas tree pastry cutter to make the lids. They took 15 minutes to make and bake, were utterly lovely to look at and delicious as well. We also made Snowballs - a kitsch Christmas drink popular in the 70s and facing a recent revival thanks to Nigella's championing several years ago. It is made with 2 measures of Advocaat, topped up with lemonade and a dash of lime juice, and for the purists served with a cherry on a stick. We also decided to try it with Cream Soda, which was utterly divine - I nicknamed it a 'Fluffy Snowball' and personally prefered it.
Drinking a Snowball for Christmas - delicious!
As Christmas music played we sipped Snowballs and munched on mince pies while we decorated the tree with some some lovely silver bauble lights, pastel glittery baubles and tinsel (Mr BB believes it isn't a Christmas Tree without some). Our tree was a bit understated as most of our decorations are in storage and with Pompey and Moscow, our two young cats, we thought it possible the tree may become a bit tousled - so we went for that look to begin with. We had forgotten to get an appropriate topping for our tree, but I feel that the wrens are an unusual but sweet touch, gifted to us from the nursery where we bought our tree.


Since I am now seriously addicted to fabric, I couldn't resist buying some Christmas prints in cool greens and blues to decorate the house. Although I love the seasonal red and white 'Scandanavian Christmas' colour scheme so popular in magazine spreads, Mr BB doesn't really like red furnishings in the house as he says it makes him feel angry due to some football association- which is obviously not the Christmas mood we want! For that reason I avoid it as much as possible. I just had to have some of the Moda 12 days of Christmas range of fabrics, and a panel of reindeers and baubles named 'Winterscape'. I then had to think of something to make with them.... and so hastily made some envelope cushions.

To make envelope cushions, all you need to do is to:
1. Measure your cushion.
2. Allowing for a seam allowance of about 1/4 inch, cut a front piece of your fabric.
3. When measuring the back piece of your fabric, add about 3 extra inches to the length of the cushion.
4. Cut the back panel in half on the long edge.
5. Along the cut edges of the 2 back panels, turn under about half an inch and sew a quarter inch seam, catching both sides of the fabric.
6. Pin the right sides of the fabrics together - the front panel to the two back panels. At this point the back 2 panels of fabric will overlap - make sure the sewn edges are in the middle and overlap. This will form the opening when the cushion is sewn together.
7. Sew your quarter inch seam all around the four sides and then turn your cushion right side out through the centre parting at the back.
8. Stuff your cushion into your cushion cover and plump.


Since one of the fabrics I fell in love with didn't fit with the other fabrics above, I decided to make something for the bedroom with it. I loved the name of the fabric 'Enchanted Winter' as much as I loved the white sparkling winter roses on a midnight blue background. Therefore I made it into a Bed Runner. This was done with a couple of metres of fabric, and an equal lengh of calico (for a cheap backing) and wadding. With right sides of the calico and chosen fabric together, sew around the edges with a quarter inch seam. Leave a 40cm gap to turn the fabric through and insert the wadding. Turn the raw edges under and sew a scant seam along the turned edges in order to close the gap (don't worry as it will be barely noticeable).

I made the bed with white bedding and draped 'Enchanted Winter' at the end, and finished the look by winding snowflake lights around the bedsted. The photo didn't quite capture how gorgeous it looked, but with the cat cosied at the end I think it couldn't have looked more enchanting.
Decorations in the bedroom - an Enchanting Christmas

Sunday, 4 December 2011

Honeycomb, Chocolate Pie and Mist

Winter Mists
It is the begining of December and it looks like the winter may finally be here with the gorgeous misty fog that has been lingering all weekend. The photo above was taken at sunset on the first Sunday of December at about 4pm. The mists which had lingered all weekend had lent a moody atmosphere, and a sense that after all of the mild weather the winter was finally arriving.

The day before, when shrouded in the miasma that pervades most of Sherlock Holmes novels, I prepared some treats to take to a friends as we were going for dinner and staying the night, and taking desert was my contribution. I had already decided on a recipe from Rachel Allen's 'Home Cooking', which I had borrrowed from the library and had been slowly devouring. I decided to make a Chocolate, Hazelnut and Caramel Tart, and some of Nigella's Hokey Pokey honeycomb as well. The honeycombe, and the pie-in-progress are pictured below - see the link for the Hokey Pokey recipe - it is so incredibally easy you will wonder why you don't make it more often. Only one warning - I perhaps had mine in too deep a dish for the time I left it to set, so despite being able to smash it into pieces, it didn't maintain the brittle consistency that makes it so irresistible, but became sticky and gooey again when sealed in a tin for transportation. However, it was still chewily delicious.
http://www.nigella.com/recipes/view/hokey-pokey-36

What a gorgeous way to start winter.

Nigella Lawson's Hokey Pokey and the Caramel and Hazelnut layer of Rachel Allen's tart

Chocolate, Hazelnut and Caramel Tart

For the pastry
I bought Ready-rolled shortcrust pastry, although there are instructions to make it from scratch.

For the caramel layer
50 g butter
75 ml cream
100 g light brown sugar
150 g roasted Hazelnuts, coarsely chopped

For the chocolate layer
200 ml double cream
200 g dark chocolate

Method

1. Preheat your oven to 180°C/gas 4.
2. Line the tart case with the pastry. Bake blind by lining the pastry with greaseproof/parchment paper when cold. Fill with baking beans, or dried pulses (you can use these over and over), and bake for 15-20 minutes, until the pastry feels dry to the touch.
3. Remove the paper and beans, brush with a little left-over beaten egg and return to the oven for 2 minutes. Take out of the oven, and set pastry aside in the tin while you prepare the filling. (This can easily be made a day in advance, and covered until you need it.)
4. To make the hazelnut caramel layer: place the butter, cream and brown sugar in a pan, bring to the boil and simmer for 8 minutes.
5. Remove from the heat, add the hazelnuts and allow to cool.
6. Spread the cooled mixture over the cooked tart shell.
7. To make the chocolate layer: place the cream and chocolate in a pan on a very low heat, stirring until the chocolate is melted.
8. Remove from the heat, pour into a bowl and allow to cool, to almost room temperature.
9. Spread the mixture carefully over the hazelnut caramel in the pastry case. Chill in the fridge for 1 hour, until the chocolate layer is set.


The lushly gorgeous Chocolate, Hazelnut and Caramel Tart


Sunday, 13 November 2011

A Glut of Pears


I am very lucky to have a pear tree growing in my garden. Last year, I searched on-line for any tip I could get about when to know that the pear was ready to harvest. I kept going down into the garden, waiting for the pear to fall from the tree when I cupped it in my hand and twisted. Finally, I got impatient with it and plucked two off that seemed relatively willing. I then put them on my kitchen bench to wait for them to ripen. A week later, I bit into one with a crunch. The waiting game continued, but despite my best intentions, I lost track of time and before I realised it the snow was covering everything and the gleaming yellow globes where providing fodder for the birds.
 
This year I was determined to be more productive, so several weekends ago I went to my local supermarket for a cardboard fruit box to store the pears in when the time came, and my vigil began. However, I just couldn't determine if they were ripe, so last Sunday my patience came to an end and I went down to grab my boxful of produce. I picked every pear I could physically lay hands on, even breaking a branch in my eagerness to pull as much as I could into my grasping palms. I had been planning all week what to do with them, and today it was time to use the glut.


Preserving Pears
(from Buster Bucks Blog)
2 cups of sugar
4 cups of water
Disolve the sugar in the water. Add the pears, and then boil them. Ladle into sterilised jars (I just put a load of jars through the dishwasher). Turn the jars upside down for 10 minutes or so to make sure they are sealed.


Pear and Vanilla Jam
(slightly varied from the recipe on the blog 'Food in Jars' - I used Jam Sugar instead of sugar and pectin - so much easier)
4 cups of jam sugar
8 cups of chopped pears
2 Vanilla pods, opened and scrapped
Bring to the boil all of the contents. Remove the vanilla pods and mash the pears. Bring to a rolling boil for 10 minutes. Bottle in sterilised jars.


I think that this will be my favourite of the pear recipes - the smell of the vanilla cooking with the pears was utterly delicious.

Pear Chutney
(Slightly varied from a James Martin recipe - I didn't have any rosemary, used brown sugar instead of demera, stem ginger instead of preserved, and added a quince, which I had left over from making Nigella's recipe. I hope these changes and additions will make it lovely - although I think the slicing of the pears into wedges is a worry as it seems very chunky)
  • 60ml olive oil
  • 200g sultanas
  • 100g raisins
  • 100g brown sugar
  • 400ml cider vinegar
  • 100g preserved stem ginger, finely sliced
  • 700g pears coared and cut into wedges
  • 100g of quince, diced
  • ½ tsp salt
  • ½ tsp nutmeg
  • 2 tsp ground allspice or mixed spice
  • 1 good pinch of saffron
1. Heat a large saucepan with the oil, add the sultanas, raisins and sugar and fry them until the fruit begins to caramelise.
2. Pour in the vinegar and boil on a high heat for three minutes. Then add the rest of the ingredients, bring to the boil, then turn to a simmer and cook until most of the liquid has evaporated. Because of the fruit, this chutney has a tendency to stick to the bottom of the pan, so stir it well and keep an eye on it. Don't let the pears cook too much; they should keep their shape.
3. Spoon it into clean hot jars, filling them as full as you can, and seal while hot. Store in the fridge.

Pear Nut Cake
(Adapted from Mary Cadogan's Pear, Hazelnut and Chocolate Cake)
I did include the recipe for this put didn't like it so have deleted it  - I'm sure the original was lovely, and mine looked good in the pictures, but I think tampering with the recipe did not give a good result this time!

Mulled Pears
Sliced Pears
1 bottle of red wine
Sprinkling of sugar
1 Teaspoon of mixed spice
Boil all the ingrediants for about 10 minutes (I kept a lid on to make sure that it wouldn't dry out). I'm not sure if it will preserve or not, as perhaps there won't be enough sugar in the mix. It was flavoured like mulled wine in terms of sweetness. Anyway, we'll see.


I had also bought two punnets of plums a week ago, some of which I had already had to throw away, and two quinces, which were too expensive to let rot in the fruit bowl. I had been meaning to cook with them all week, and knew I needed to take advantage of this production zone to use this produce as well. So incredibly, I also managed to make:

Nigella's Quince Brandy (minus all of the flavourings as I didn't have any in the house - I might get some cinnamon and vanilla to add later but not the star anise!)


A Ginger Sponge: a sponge recipe with some preserved stem ginger in it (I was experimenting with a recipe I wanted to submit for a competition - unfortunately it didn't really work as the sponge was sticky and and one side broke up, the other one caved in slightly. Still, it was utterly delicious as a desert).

A small jar of Plum Jam
I weighed the plums that I had (about 8) and then put half that amount of sugar into the recipe. I boiled for 10 minutes to make the jam.
After spooning some over my sponge, I bottled the remainder into a small jar.

My desert of Ginger Sponge with Plums and Cream was gorgeous -  delicious, sticky, gingery and sweet, with a hint of cool creaminess from the drizzle of cream over the top. It didn't matter that the sponge was a bit of a flop after all as the result was divine!
I was delighted to achieve so much in an afternoon. It really was very easy - the biggest task was peeling and cutting the pears. I had organised my day as well in such a way that I was building on the flavours and techniques of each successive dish, so I only needed to wash out the pan each time before starting the next batch. The only thing is that, try as I did, I could not get through all the pears! I'll be taking a bag with me to quilting class and to work tomorrow to see if anyone else has some pear recipes they can try. And if I'm lucky, I may get to taste their efforts too!


Monday, 7 November 2011

Log Cabin Quilt in a Day

I have recently started a quilting course, making a sampler quilt with a block a week as the focus. I have never quilted before, aside from a crazy patchwork bear that I made in the Girl Guides and an attempt to sew squares of fabric together at some point after that. I had wanted to try patchwork for a long time, so when I found the quilting course at a shop relatively nearby, Thread Bear, http://www.thread-bear.co.uk/, I jumped at the chance. And I am now addicted. Fabric is my drug of choice, and my only regret is that my little pink sewing machine is buried in storage, although I have to say that I am starting to think that I should upgrade to a porshe of the sewing world, a sewing machine that will quilt with amazing stitches. But as long as I can borrow a machine for the course, I can take my time researching.


I have included the block from my sampler quilt above, but this blog is to talk about the second course I signed up to one recent Saturday, to make a Log Cabin Lap Quilt in a day. The history of the log cabin quilt may even date back as far as the Ancient Egyptian period, but seems to have found it's own identity in pioneering America. The centre square represents the hearth, and is usually red or arange, with the strips considered to be logs of the log cabin. Traditionally, there is a dark side and a light side, perhaps to represent that the log cabins often only had windows on one side, although some consider it prehaps as a more moral message - the light and the dark side of life, or happiness and sorrow. Log cabins with a black centre where supposedly used by the Underground Railway Quilters to symbolise to slaves in North America the houses that were supporters and would help them with food, clothing and accomodation and further help them to escape. With such an amazing history it felt fantastic to continue such a beautiful and traditional craft.

The first, exciting part was to decide on the colour scheme of my quilt. Several days before, I had been driving to see a friend in the country, past rows of gorgeous Autumnal trees, turning from green to golden with splashes of orange and plum in between. I was decided. I wanted the quilt to have an Autumnal feel. So passed hours choosing fabric, with everyone at Thread Bear being so patient and helpful, giving great advice and even providing copious amounts of tea.

Originally, I had wanted to have a plum centre, with light to dark greens one side and yellow, orange and red strips on the other side. That didn't work, and so I changed my mind and decided to go with the colours below. A yellow leaf pattern to border the quilt, and an apple pattern on the back, with a binding of brown fabric with acorns dotted on it makes it more Autumnal than Christmassy.


Kate taught us a process of making log cabin blocks that was so quick and easy that it really was, incredibly, possible to make most of the quilt in a day. It was a lap quilt, so we made 16 squares, using what is called a washing line technique. You cut all of the 16 centre squares with a rotary cutter, and a number of long strips in your other colours. You then sew the first strip to the centre on all the squares, snip it to size, and then sew the second strip to all 16 squares, and so on to build up all the blocks. I didn't take any photos of this process but Lisa, who was also on the course, has some lovely ones on her blog Lisa's Stitching Life: http://lisa-iris.blogspot.com/

Perhaps my favourite part was when I got home. I laid out the blocks in a variety of patterns. Below were some of the choices and effects - you can see how it can totally change the look of the quilt:
A more tradiditonal pattern - I felt it worked well, but wanted something a little less structured to resemble falling leaves.

An overall star pattern - I just felt this looked too strong with the red, and too Christmassy as well.
A cross pattern - depending on how you place the squares- you could see the above would need a bit more playing with. It is interesting how the overall effect can be so different, even thought you are using exactly the same blocks.

In the end I chose a pattern that was rather unusual as opposed to the more traditional ones. It has a centre hourglass, with an almost wavy, slightly more organic effect. My choice made, I sewed up the front panel, added the back, and started quilting it by sewing through buttons of leaves in autumn colours. Tiredness did eventually send me to bed with my quilt all but finished, apart from some more buttons to sew on to quilt it together, and the acorn binding to add. I love it! I am now just wondering if I can bear to give it away as a Christmas present....

Sunday, 16 October 2011

Delights of Autumn

Minature Pumpkins (Copyright Bygone Babe)

Autumn is the time to go shopping for cosy pyjamas in order to rock that Wee Willie Winkie chic and avoid putting on the heating as long as possible while we cozy up indoors. But with the mild weather still continuing shopping was furthest from my mind, and all I wanted to do was walk in the warm October sunshine, as the leaves turned and fluttered to the ground. Last weekend a friend and I were stalking the deer in Bushy Park, watching squirrels horde acorns, and avoiding the temptation to pluck the stems of unidentified mushrooms. Today, Mr BB and I went strolling through Crystal Palace Park, past the sphinxes, to find a bench to sit on to read. It was so warm in the sun that there was no compulsion to leave the view of the misty, pink tinged valley and hills of Kent and Surrey for some time.
A pot of tea for two (Copyright Bygone Babe)

Once home, with the sun steaming through the windows, it was dificult to ignore that the house needed a good going over. I enjoy those old fashioned English novels, where they always have someone in, like a matronly Mrs Pinkhurst or some such character, 'to do the rough' . With no such dear in sight, I was doing the soft and the rough. In the kitchen, a search and eradication of stray sugar granules, left over from Mr BB's incident with a bag of sugar, then led to a thorough going over of the tea and coffee cupboard. Gasping for a cup of tea, which I was determined to have as a reward after my job was finished, I was suprised to unearth the above tartan treasure, which Mr BB must have inherited from my MIL. It had been so long since I have had tea in a pot that I thought this would make my reward even more special, so I scrubbed the inside with bicarbinate of soda, fantastic for removing tannin from all tea vessels, and set the pot to warm. 

What a reward it was! Two cups from the teapot were thoroughly enjoyed while I lingered over a puzzle book. During the week, puzzles seemed to abound at work. Some were mulling over 6 across, others were stuck on soduku, with even some working the wordsearch. I decided to extend the craze into the weekend and it was a great way to relax with my tea. After trying the Number Crunchers, the Arrowwords and the Hex puzzles, I settled down to my favourite - Logic puzzles, which are stories with fragments of clues, gradually pieced together to find out which 5 people had what amount of money, where it was kept and how they earnt it, or something equally inane. I think I like them because they are most like the old fashioned murder mysteries Agatha Christie used to write (Mr Peabody did not have the hammer while he was in the library, but the person in the kitchen had the chainsaw... ) 

A final delight this Autumn day was to linger over a slow cooked dinner - after all, this is the season of stews and casseroles. While returning from our walk, Mr BB and myself had discussed dinner and concluded that it would be Beef Pie for Mr BB and Mushroom Pie for myself, with Nigella's Hasselback Potatoes and some peas. Imagine my delight when I entered our local supermarket to purchase the necessities and was able to nab a recipe card as well. So handy.
Mushroom Pie (Copyright Bygone Babe)

The Beef Pie was made with stewing beef, which required about an hour cooking, once sealed, with the carrots and baby onions, and the gravy made from stock, plain flour and tomato paste. The Mushroom Pie was made second, with several types of mushrooms, baby onions, and a gravy made in the same way as above. While the filling for the pies was simmering, and sticking to the bottom of the pans, the potatoes were roasting in the oven.

Mr BB had been pestering me to make these Hasselback Potatoes ever since he had tasted them one dinner at the home of my friend, a true Domestic Goddess who had married an American Jamie Oliver. Needless to say dinner at their place was always a treat, but I harboured no illusions tonight I would come close to their usual gorgeous fare.

After an hour of simmering and stirring, the pies were ready to ladle into mini casserole dishes and a lid of puff pastry was laid over the top. They then had another half an hour in the oven, next to the potatoes. I happened to spy one of the apples beginning to turn, so decided to use several in order to make an impromptu apple crumble, which I popped into the oven as I served the main course (I fear my greed was too great as I didn't manage to eat the crumble, and have since relegated it to the fridge for another day.)

When it came to serving the pies, we removed the lids and then scooped the inside on top of the puffed pastry so it could cool before it was devoured. The aroma from both pies was delicious. The baby onions and small, whole mushrooms in my pie had still held their shape, while the rest had combined and melted into a delcious gravy, enhanced by the sherry I had decided to splosh into it while partaking of a rather large nip. It was a large serving, enough for two, and I thoroughly enjoyed it, and will have another chance to do so with the leftovers. Mr BB, I noticed, did not eat all of his pie filling either, but every last one of his Hasselback potatoes had disappeared.

Beef Pie and Nigella's Hasselback Potatoes (copyright Bygone Babe)

Sunday, 2 October 2011

A Renewed Summer

Autumn in Highgate Cemetary (Copyright Bygone Babe) 

Just as we were settling in to casseroles and winter pajymas, along comes the most glorious week of weather that pushes back October and urges us to embrace summer again. I have been rushing home in the evenings to go for a walk in the dusk, and supping on salads as it has been too warm to cook. The bed has been stripped of the new winter duvet, and we are just sleeping with sheets. However, pleasant as it was, reading in the garden most of Saturday didn't seem to be enough to embrace the spirit of this renewed summer. I formulated a plan to finally do the one thing I had wanted to do all summer, but hadn't managed to - swim in the ponds on Hampstead Heath.

I grew up swimming - not just at the local pool, where I spent most of my time, but also in rivers, dams, waterfalls and the ocean. And I am sure that I am not alone in this experience. So why did it suddenly become the mission of the BBC this summer to sex up what we all did out of necessity and daring in our youth, and rebrand the experience Wild Swimming? And even more suprising, why did it utterly capture my imagination? Was it because of nostalgia? Or was it because, despite the varied places that I had swum growing up, and on holiday, I have only ever swum in swimming pools in the UK, and almost all of those indoors?

It was then that I looked for places to swim 'wild' near London, and was reminded of the pools on Hampstead Heath. While not the true definition of wild, it was certainly rustic and would be a lovely day trip. And I would be able to go alone but swim in company - it would be foolhardy to swim solo anywhere, especially somewhere you didn't know, and since most of the nets I had cast about the idea of wild swimming had only returned wrinkled noses, I was going by myself. Bygone Bloke was on a course and the sun was beaming, so I resolved to make a day of it and capture the very last bit of this glorious weather.

Lauderdale House (Copyright BygoneBabe)

It wasn't long before I made an unexpected discovery on my way to the ponds. Lauderdale House in Highgate is a property built in 1582, which has been brought back from near ruin from a host of historic owners, including at least two Lord Mayors of London, Royalists, Quakers and even Nell Gwynn, a mistress of King Charles the II. It was an ideal spot, and time, to eat. I sat outside in the garden and ordered a delicious lunch at the restaurant- a three bean and cashew nut burger, served not with buns, but with salad, and the most unusual and delicious mango and mayonnaise sauce, flavoured with a hit of curry. Divine.

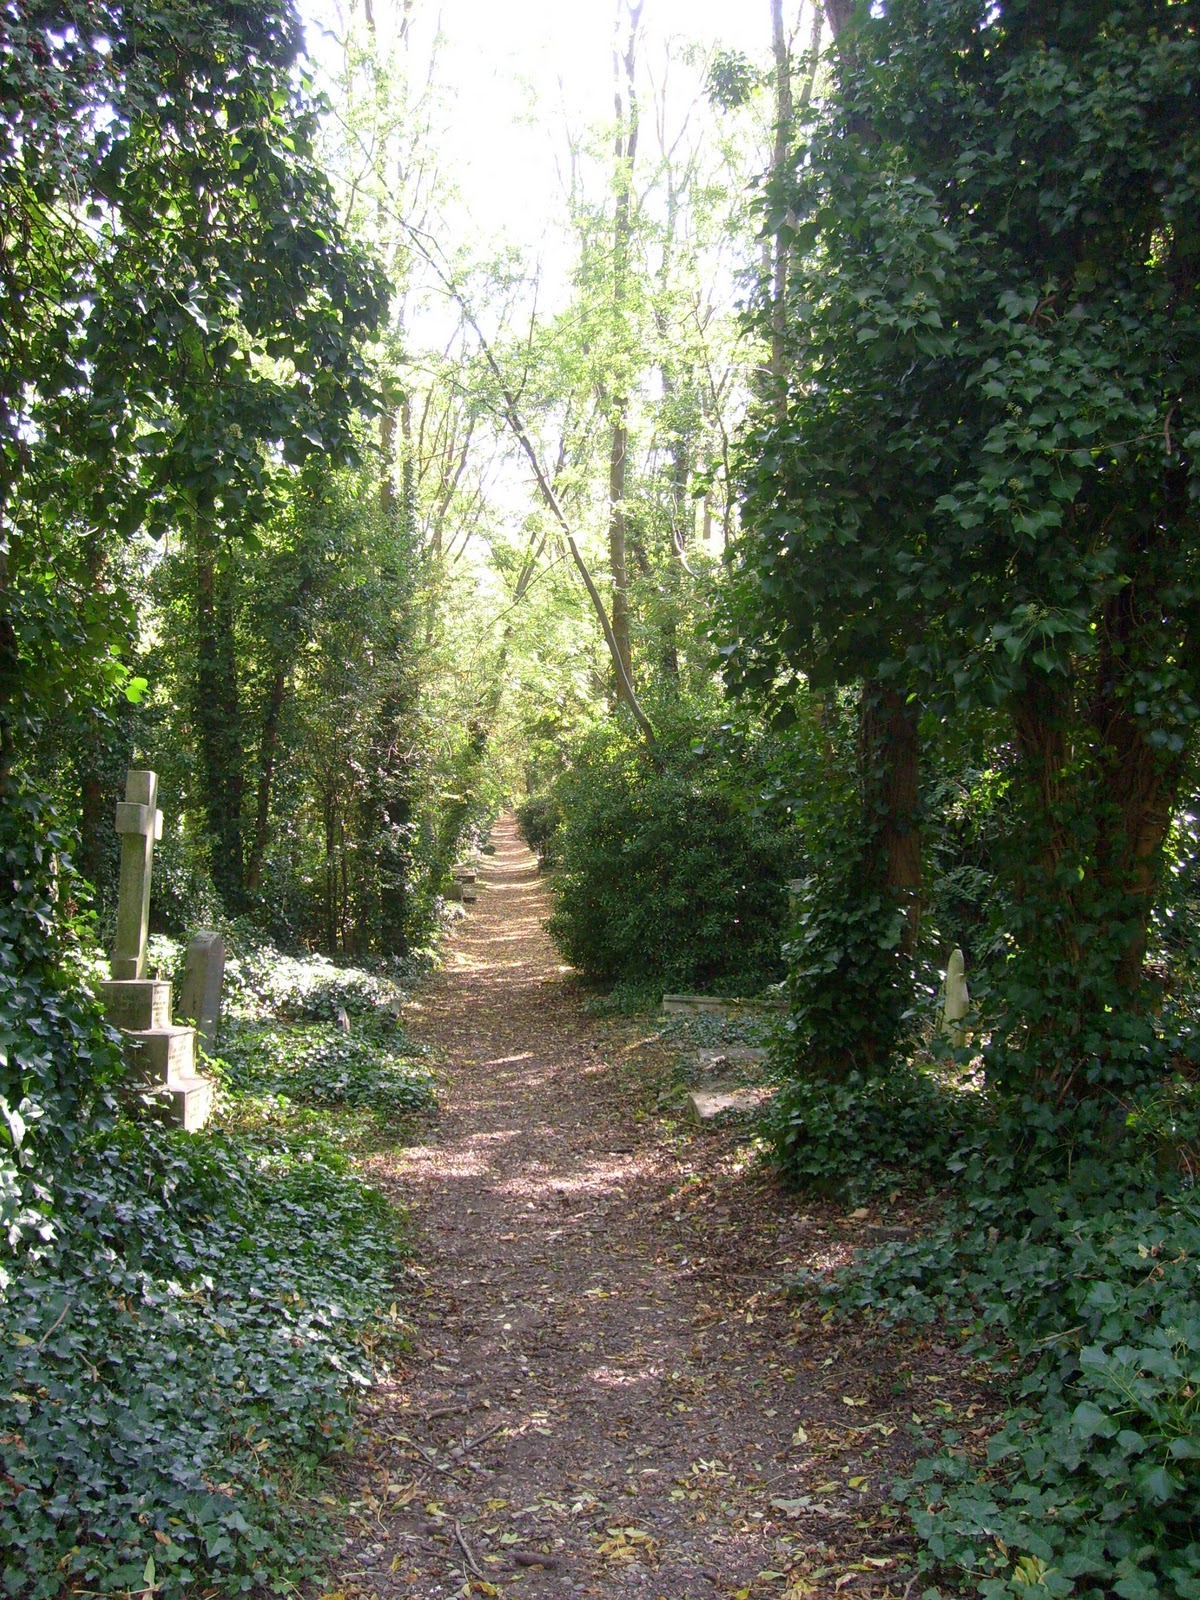
East Highgate Cemetary (Copyright Bygone Babe)
 Wandering through Waterlow Park, filled with people soaking up the unexpectedly warm rays, I reached Highgate Cemetary. Deciding to leave the West Cemetary, which can only be entered on a formal tour, for another day, I went into the East Cemetary. At first, map in hand, I felt like a treasure hunter seeking out the graves of Karl Marx, Douglas Adams, Sidney Nolan and Mary Ann Evans (George Eliot). The cemetary was so old, peaceful and beautiful, with ivy trailing over many graves, shaded by the autumnal trees. At first, the sadness that usually strikes me in cemetaries didn't arrive - instead I felt that many of the people who are buried here were still living, through their works, and even those who I didn't know revived as I was introduced to them through the cemetary guide I held. However, as I walked down a quiet pathway, alone, the poignancy touched me. For every grave that was here, there were partners, spouses, parents, brothers, sisters, who keenly felt the loss - for it is still an operating cemetary.

I left and walked further down Swain's Lane to Parliament Hill Fields, my ultimate destination. Parliament Hill acquired this name in the 17th Century as it was defended by troops loyal to the Government during the Civil War. It is now the site of three of the thirteen of London's protected views. Today, it was filled with Londoners enjoying picnics, flying kites, sunbathing, walking adorable dogs and, of course, going for a swim.

The Hampstead ponds were originally springs that were dammed to be reservoirs in the 17th Century. Of the 25 ponds that are on the heath, there are three that are swam in - a mixed bathing pond, and 2 others for single sex bathing. People have been swimming here for centuries, but it was only due to a High Court decision just 7 years ago that I was priveleged enough to be able to swim there today. The first pond that I came across was the Men's Pond, were there were plentiful gaps in the trees for passerby's to admire the diving antics of the men. To my suprise, there was also a woman fishing at one end of the pond!

The women's pond was further along, quite seperate, and totally enclosed by large trees to protect the modesty of the women. Plunging into the pool was breathtaking, literally! However, after two laps, even though I could not feel my feet or hands, I was tingling all over with an exhileration which was enhanced by swimming amongst the trees. Ducks frolicked on the pond and nestled on the banks. The occassional rasp of an autumn leaf against my pimpled flesh reminded me that normally it would be even colder at this time of year. A passing woman said it was like the Titanic, but I didn't feel like Kate Winslet at all - and although there were shrieks and gasps coming all around, they were of exhileration and delight. My friend had said she felt like Jane, going for a dip while Tarzan was off somewhere, and I think this is a much more apt (and romantic) image. But for me it was too busy to believe I was Jane. I thought of all of the women who had swum here over the centuries. With bikinis and swimmers covered by the opaque water, it was not so difficult to feel like you were one of the Victorian women who may have swam there. It was certainly evocative of another time, especially when there were some very vintage bathing caps bobbing in the water.

It was a thoroughly exhilerating plunge, and I had forgotten the cold in my relaxing laps until I went to get out and was so numb I could barely pull myself from the water. Sitting in the sun in the meadow, a relaxation area set aside for the bathers, warmed me up, as did the walk to a nearby coffee shop, but even as I write this blog I can still feel the effects of my plunge. Gorgeous as it was today, I won't be there at the end of this month, when incrdeibly the forecasters have predicted snow.
The Ladies Pool at Hampstead Heath (Copyright BygoneBabe)